News

How is MDF Made?
Author Chigwell Building & Joinery
Date 01/10/2023
MDF is a popular type of engineered wood used in various projects.
While it is often confused with plywood, it’s not the same as it’s denser and stronger.
Table of Contents
- What is MDF?
- Physical Properties of MDF
- Typical Applications
- MDF Fibre Preparation
- MDF Sheet Formation
- Advantages of MDF
- Disadvantages of MDF
- Conclusion
What is MDF?
MDF stands for medium density fibreboard.
This engineered wood product has gained a great deal of popularity over the years as it offers various advantages.
This includes affordability and the fact that it can be used for a myriad of purposes, ranging from home furniture to decorative products.
In fact, it’s often thought to be the same as plywood or fibreboard.
This is not the case however, as it’s considerably denser and a fabricated product using various elements.
MDF is composed of hardwood or softwood residuals which are broken down into wood fibres.
They then combined together with wax and resin binder by applying very high pressure and heat.
Physical Properties of MDF

Image credit: Amazon
MDF is made up of 82% wood fibre and 9% resin.
Urea-formaldehyde resin glue is used.
There is 8% water and 1% paraffin wax added to this, to ultimately achieve the density desired from the boards.
In fact there are different densities and classifications of MDF, namely light, standard, flame retardant, high density and exterior MDF boards.
MDF is considerably uniform when compared to natural woods.
It does not contain any rings or knots on the surface area.
MDF has a flat and smooth surface which makes it ideal for veneering as there are no underlying grains or imperfections.
Typical Applications
MDF is used for a wide variety of applications and projects nowadays.
MDF is best used for indoor applications as it’s widely known to have poor moisture resistance.
It’s commonly used to build home furniture, such as cabinets, drawer fronts and shelves.
It’s also a popular option for wall linings, partitions and school projects as it’s very flexible and versatile.
MDF is commonly used for flooring and wainscoting too.
The density of MDF boards make it an ideal choice for decorative overlays and to make the walls of pipe-organ chambers.
It is also used in speaker boxes and theatre set construction.
MDF Fibre Preparation

Image credit: Pexels
The following processes need to be carried out to produce MDF:
Debarking
Logs used are debarked since the bark is not ideal for use in wood-based panels.
The bark is thus removed from the logs by means of drum or rotor debarkers.
In the former, the logs will rub against the drum and one another, thereby removing the bark.
If a rotor debarker is used, each log rotates around its longitudinal axis, and through the rolling process the rotor will peel off the log’s bark.
Chipping
The round wood is chipped into wood chips.
The size of these chips will determine the length of the flakes or fibres achieved later.
A drum chipper or disc chipper is used for this process.
Washing
The wood chip washing stage refers to when stones, sand, or any other fine non-metallic foreign objects are washed out of the wood chips.
Refining
The wood chips will subsequently undergo refining in a refiner in order to be ground into high quality fibres suitable for MDF sheet formation.
This is important to ensure a uniform quality in the fibres.
The wood chips will first be boiled and then taken to the refiner, where they get defibrated.
Generally single-disc refiners are used for this process.
MDF Sheet Formation
Following the above stages, the MDF sheet formation can then take place.
This comprises various phases, namely:
Glueing
When glueing, it’s critical to apply a precise dose of adhesive.
This is added to the fibres and is important that it gets evenly distributed.
In order to determine the specific amount of adhesive needed, the weight of the wood will be measured using a belt weigher.
Sometimes substances are added to the adhesive to improve its moisture resistance or for fire protection.
Forming
The glued fibres will then be spread out evenly onto a conveyor belt which is continuously running.
Liquid Application
Next, release agents, water and any other additives will be sprayed onto it, prior to proceeding to the pressing stage.
Pressing
During pressing, the glue will be cured as a result of the pressure and high temperature being applied.
The mat composed of fibres and flakes will be pre-pressed and then transferred to the press to be pressed to the required thickness.
The glue will harden, and as a result the wood particles will be plasticised.
Multi-opening presses and continuous presses can be used for this process, with the latter being the most popular as they offer a higher output.
Advantages of MDF
Some of the advantages of MDF include:
- It is flexible
- It can be painted
- It is consistent both in strength and size
- It is strong and not susceptible to splitting when screws are installed or pulled out
- It is less prone to expansion and contraction than natural wood
- It bonds well to wood glue
- It can be laminated and doweled
Disadvantages of MDF
The main disadvantages of MDF include:
- Low moisture resistance, so warping could occur if exposed to high humidity
- May release formaldehyde which is a human carcinogen
- It is denser than chipboard or plywood so not ideal for some applications
- If it is a low grade MDF it can swell and break as soon as it is exposed to water
- It tends to dull cutting blades much more quickly than other types of wood
Conclusion
As you will have discovered, the manufacturing process of how MDF is made contains a number of stages.
From sourcing, debarking and chipping the wood, to refining, glueing and pressing, MDF is a material that takes its form from a combination of intricate manufacturing techniques.
But the end product is a highly versatile and strong material that many trades use for a variety of applications.
The versatility and affordability of MDF makes it one of the most popular materials used in a myriad of projects nowadays.
MDF can be cut to size, laminated and edged to create a variety of stunning bespoke furniture pieces from cabinets, to kitchen units to custom wardrobes and more.
So it’s no wonder MDF is such a popular and commonly used building material.
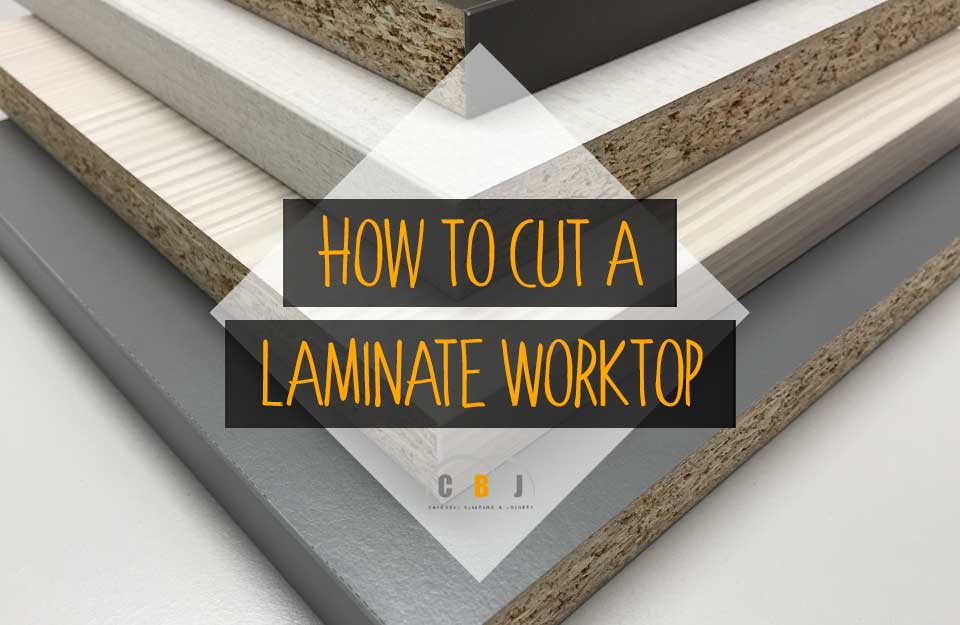
How to Cut a Laminate Worktop
Author Chigwell Building & Joinery
Date 06/08/2023
Whether you're remodelling your kitchen or working on a DIY project, knowing how to cut a laminate worktop correctly is essential.
Laminate worktops have gained immense popularity due to their affordability, durability, and versatility.
With the right tools and techniques, you can achieve precise cuts and create seamless joints for a professional finish.
This comprehensive guide will walk you through the step-by-step process of cutting laminate worktops with precision and confidence.
Table of Contents
- What is a Laminate Worktop?
- Why Cut a Laminate Worktop?
- Tools & Materials
- What’s the Best Way to Cut a Laminate Worktop?
- Step 1: Measure & Mark
- Step 2: Secure the Worktop
- Step 3: Mark the Cut Line
- Step 4: Choose the Right Blade
- Step 5: Cutting with a Jigsaw
- Step 6: Cutting with a Circular Saw
- Step 7: Finishing Touches
- Step 8: Clean & Install
- How to Measure a Laminate Worktop
- Clear the Worktop
- Start with the Length
- Consider Overhang
- Measure the Depth
- Account for Cutouts
- Check It’s Square
- Double-Check
- Frequently Asked Questions
- Q. What’s the Best Tool to Cut Laminate Worktops?
- Q. How Do You Cut Laminate Worktops Without Chipping Them?
- Q. How Do You Seal a Laminate Worktop After Cutting?
- Tips for Cutting a Laminate Worktop
- Use the Right Tools
- Measure Twice, Cut Once
- Clamp the Worktop Securely
- Use a Guide
- Cut Slowly & Carefully
- Wipe Away Sawdust
- Inspect Your Cut
- Conclusion
What is a Laminate Worktop?

Image Credits: Pexels
A laminate worktop is a popular choice for kitchen and countertop surfaces due to its durability, affordability, and wide range of design options.
It’s made by layering multiple sheets of kraft paper impregnated with resin and bonding them under high pressure and heat.
The top layer is a decorative laminate, available in various patterns, colours, and textures, which gives the worktop its desired aesthetic.
Beneath the decorative layer is a core layer that provides structural stability, and at the bottom, there is a balancing layer that prevents warping.
Laminate worktops are known for their resistance to scratches, stains, and moisture, making them easy to clean and maintain.
In addition, they offer versatility in design, allowing homeowners to achieve the look of natural materials like wood, stone, or marble without the associated cost or maintenance requirements.
Why Cut a Laminate Worktop?
Cutting laminate worktops is often necessary during installation or renovation processes for several reasons:
Size Adjustment
Laminate worktops come in standard sizes but may need to be cut to fit specific dimensions or layouts.
Cutting allows you to customise the worktop to match the available space accurately.
Appliance Installation
When installing kitchen appliances like sinks, cooktops, or built-in ovens, you often need to create precise cutouts in the worktop to accommodate them.
These cutouts ensure a seamless fit and proper functionality of the appliances.
Corner & Joining Cuts
Laminate worktops may require cutting at corners to achieve a perfect fit in L-shaped or U-shaped kitchen layouts.
Additionally, if you have multiple worktop sections, the cutting may be necessary to create clean and tight joints between them.
Personalisation
Cutting laminate worktops can also be done for aesthetic purposes.
Consider incorporating unique design elements, such as curved edges or decorative patterns, to add a personal touch to your kitchen.
Repair & Replacement
In cases where the worktop is damaged, cutting may be necessary to remove the affected area and replace it with a new section.
This is particularly relevant for laminate worktops, as damaged portions can be replaced without refitting the entire surface.
Tools & Materials
To cut a laminate worktop, we recommend you have the following tools and materials to hand:
- Laminate worktop
- Measuring tape
- Pencil
- Jigsaw or circular saw
- Fine-toothed saw blade
- Sandpaper (medium and fine grit)
- File
- Dust mask
- Masking tape
- Safety goggles
What’s the Best Way to Cut a Laminate Worktop?
The best way to cut a laminate worktop is using a circular saw.
Follow the step-by-step guide below to know how cut a laminate worktop:
Step 1: Measure & Mark
Start by measuring the dimensions needed for your laminate worktop.
Use a measuring tape to determine the length and width of the required cuts.
Mark the measurements clearly on the surface of the laminate using a pencil.
Step 2: Secure the Worktop
Place the laminate worktop on a stable and level surface, ensuring it overhangs the edge sufficiently to accommodate the length of your cuts.
Use clamps to firmly secure the worktop, preventing it from moving during the cutting process.
Step 3: Mark the Cut Line
Draw a straight line connecting your marked measurement using a combination of squares or straightedges.
Double-check the accuracy of the line to ensure a precise cut.
If you plan to install an under-mount sink or a cooktop, account for any additional cutouts required.
Step 4: Choose the Right Blade
When cutting laminate worktops, using the correct blade is crucial.
Opt for a fine-toothed saw blade explicitly designed for melamine-faced chipboard for clean, chip-free cuts.
In addition, ensure that the blade is sharp and in good condition to avoid tearing or splintering.
Step 5: Cutting with a Jigsaw
If you're using a jigsaw, drill a hole near one end of the cut line, slightly inside the marked area.
Insert the jigsaw blade through the hole and carefully follow the marked line, applying steady and even pressure.
Take your time and let the blade do the work.
Keep the base of the jigsaw firmly against the worktop surface to prevent excessive vibrations.
Step 6: Cutting with a Circular Saw
If you prefer a circular saw, adjust the cutting depth to a slightly more pronounced position than the thickness of the laminate.
Align the saw blade with the cut line, ensuring that the edge of the base plate rests firmly against the straightedge.
Slowly guide the saw along the cut line, maintaining a steady pace to achieve a clean and accurate cut.
Step 7: Finishing Touches
After making the initial cut, you may notice some rough edges or uneven cuts.
Use sandpaper with medium grit to smoothen the edges to remove any burrs or imperfections.
Follow up with fine-grit sandpaper to achieve a smooth and polished finish.
Finally, use a file to refine the shape and remove any roughness for tight corners or curved cuts.
Step 8: Clean & Install
Once you're satisfied with the cuts and overall finish, thoroughly clean the laminate worktop to remove sawdust or debris.
Then, install the worktop, ensuring proper support and secure attachment.
How to Measure a Laminate Worktop

Image Credits: Pexels
Now that you’ve learned how to cut a laminate worktop, it's important to measure the laminate worktop accurately.
Measuring a laminate worktop correctly ensures a proper fit and successful installation.
Here's a step-by-step guide on how to measure a laminate worktop:
Clear the Worktop
Remove any items, appliances, or clutter from the laminate worktop to ensure a clear, unobstructed surface for measurement.
Start with the Length
Use a measuring tape to measure the length of the area where the worktop will be installed.
Measure from one end to the other, considering any corners, walls, or gaps where the worktop must fit.
Consider Overhang
Decide on the desired overhang of the worktop.
The standard overhang is usually around 3.8 to 5cm (1.5 to 2 inches) on the front edge of the base cabinets.
Measure the distance from the edge of the base cabinets to determine the overhang length.
Measure the Depth
Determine the depth or width of the worktop by measuring from the back wall to the front edge of the base cabinets.
Take measurements at different points along the length to account for any irregularities or wall or cabinet depth variations.
Account for Cutouts
If you need to install appliances, sinks, or cooktops within the worktop, measure the dimensions and locations of the cutouts required.
Measure each cutout's width, depth, and shape, and ensure to include these measurements in your overall worktop dimensions.
Check It’s Square
Verify if the corners and angles of the area where the worktop will be installed are square.
Use a carpenter's square or a combination square to check the right tips of the corners.
If the corners are not perfectly square, measure the lengths of the diagonals to confirm the accuracy of the measurements.
Double-Check
Before finalising the measurements, double-check all the dimensions and ensure they’re accurate and consistent.
Take additional measures if needed to ensure precision.
Frequently Asked Questions
Q. What’s the Best Tool to Cut Laminate Worktops?
The best tool is considered a circular saw with a fine-toothed blade for cutting laminate countertops.
Its adjustable depth and precise cutting capabilities are ideal for achieving clean and accurate cuts on laminate surfaces.
Q. How Do You Cut Laminate Worktops Without Chipping Them?
To cut laminate countertops without chipping, follow the below mentioned steps:
- Use a sharp blade with fine teeth on a circular saw.
- Apply painter's tape along the cutting line to reduce splintering.
- Cut the laminate from the backside to minimise chipping, and go slow to allow the blade to cut through smoothly.
Q. How Do You Seal a Laminate Worktop After Cutting?
After cutting a worktop, seal it by following these steps:
First, lightly sand the cut edges with fine-grit sandpaper to smooth them.
Clean the surface to remove dust and debris.
Apply a laminate edge banding or a clear silicone sealant to protect the edges from moisture and enhance durability.
Tips for Cutting a Laminate Worktop
Use the Right Tools
A circular saw is the best for cutting a laminate worktop, but you can also use a jigsaw or a hand saw.
Make sure the blade is sharp and the correct type of blade for the material of your worktop.
Measure Twice, Cut Once
It’s important to measure carefully before you cut.
Use a tape measure and a pencil to mark the line where you want to cut.
Clamp the Worktop Securely
This will prevent it from moving while you are cutting.
Use C-clamps or bar clamps to secure the laminate worktop to a workbench or other sturdy surface.
Use a Guide
A straightedge guide will help you to make a straight cut.
You can use a piece of plywood or a metal ruler as a guide.
Cut Slowly & Carefully
Don't try to force the saw through the worktop.
Cut slowly and carefully to avoid chipping or splintering the laminate.
Wipe Away Sawdust
As you cut, sawdust will accumulate on the worktop.
Wipe it away with a damp cloth to keep the surface clean.
Inspect Your Cut
Once you’ve finished cutting, inspect the cut to ensure it is straight and free of splinters.
If you are unhappy with the amount, you can sand it smoothly.
Conclusion
To wrap up, learning how to cut a laminate worktop is a valuable skill for any DIY enthusiast or homeowner looking to upgrade their kitchen.
Following the step-by-step guide outlined in this article, you can achieve precise and professional-looking cuts, ensuring a seamless fit for your worktops.
However, if you're not confident in your cutting abilities or prefer to leave it to the experts, Chigwell Building Joinery offers a convenient solution.
Our cut-to-size laminate board service removes the hassle, providing you with tailor-made worktops that perfectly suit your requirements.
Whether you decide to tackle the cutting yourself or opt for the professional assistance of CBJ Ltd, you can confidently transform your kitchen into a functional and visually appealing space.
So, don't hesitate to contact us and take the first step towards your dream kitchen today.

12 Best Plywood Alternatives
Author Chigwell Building & Joinery
Date 01/06/2023
Depending on your intended use, there are several plywood alternatives you can use for various building projects.
But in doing so, you must choose carefully as some materials are inferior in many ways.
Typically, most contractors and experienced DIY enthusiasts opt for plywood first due to its strength, versatility and high end finish.
But with recent issues surrounding supply chains and increased prices, plywood is no longer as attainable as it once was.
As a result, you may need to look for a suitable alternative for your project.
Below we outline several plywood alternatives that can be used instead, whilst still giving great results.
Table of Contents
- What is Plywood?
- Why is Plywood in Short Supply?
- Best Plywood Alternatives
- Polyurethane Board
- Medium Density Fibreboard (MDF)
- High Density Fibreboard (HDF)
- Oriented Strand Board (OSB)
- Particle Board (Chipboard)
- EKO Ply
- Solid Wood
- Fibre Cement Board
- Fibreglass (GRP)
- Masonite
- High Density Polyethylene (HDPE)
- Bamboo Plywood
- Pros & Cons of Plywood
- Strength & Durability
- Range of Applications
- Resistant to Warping & Cracking
- Easy to Use
- Cost
- Environmental Impact
- Limited Aesthetic Appeal
- Prone to Moisture Damage
- Conclusion
What is Plywood?
Plywood is a type of engineered building material made from thin layers or "plies" of wood veneers that are glued together under high pressure.
Typically, the layers are oriented with their grain direction perpendicular to each other, which gives the plywood its strength, stability and in certain cases, flexibility.
The number of plies used to manufacture a sheet of plywood can vary depending on the intended use and the desired thickness and strength.
Plywood is commonly used in construction, furniture-making, and other applications where a strong, durable, and stable wood material is required.
It can come in various sizes, thicknesses, and grades, depending on the intended use.
Some types of plywood may also have a decorative veneer on the outermost layer to enhance its appearance.
However, plywood is regarded as an expensive material, and may not always be suitable for projects on a tight budget.
Due to the pandemic and recent wildfires in countries where plywood is mass produced, plywood has become harder to obtain.
So finding suitable alternatives to plywood have increased in demand.
Why is Plywood in Short Supply?
There’s numerous factors why timber and consequently plywood is in short supply, which includes:
Pandemic
When the onset of the COVID-19 pandemic hit, there was a global slump in sawmill activity, which led to far less plywood being produced.
The resulting knock in effect caused a major shortfall in timber-based materials being readily available as they were before.
Log Shortage
Due to both the pandemic and weather conditions, the number of logs cut in Europe dramatically fell from 2020 onwards, leading to a supply drop in raw materials.
Plywood use was still high as the construction industry continued to operate, so existing stocks disappeared whilst production simply couldn’t keep up with demand.
Wildfires
To make matters worse, extreme weather conditions during summer months led to a number of forest fires, destroying literally millions of acres of forests.
Brexit
Due to the UK leaving the EU, the importation of timber material involved a great deal more red tape.
Moreover, the weakening British pound sterling meant purchasing power had been severely depleted, making it harder to acquire plywood at previously affordable prices.
Best Plywood Alternatives
You may be surprised to learn there are several excellent alternatives to plywood.
Depending on their use and the type of project you have in mind, some of the following materials may actually be more appropriate as well as more affordable than plywood sheets:
1. Polyurethane Board

Image credit: Pixabay
Polyurethane board, commonly referred to as PU board, is a type of rigid foam insulation material made from polyurethane foam.
It's frequently used in building and construction as a thermal insulator for walls, roofs, and floors.
Polyurethane board is manufactured by combining polyols (organic compounds with multiple hydroxyl groups) and diisocyanates (organic compounds with multiple isocyanate groups) in the presence of a blowing agent.
This causes the mixture to then expand and form a foam.
The foam is then cured and cut into boards of various sizes and thickness.
As a result, polyurethane boards have excellent thermal insulation properties, high compressive strength, and good resistance to water penetration.
It's also very lightweight, easy to install and affordable, making it a popular alternative to plywood for a wide range of building applications.
2. Medium Density Fibreboard (MDF)
Image credit: Amazon
Medium Density Fibreboard is a type of engineered wood product made by breaking down hard or softwood residuals into tiny fibres, which are then combined with wax and resin under high pressure to form panels.
MDF is typically denser than plywood and particleboard, and has a smooth and uniform surface that's free from knots and grains.
This makes it a popular plywood alternative when constructing furniture, cabinetry, shelving, and decorative mouldings.
The material can be cut, shaped, and routed with standard woodworking tools such as jigsaws and CNC machines.
It can be painted, veneered or laminated to achieve a variety of finishes.
Finally, it’s very reasonably priced, making it a suitable alternative to plywood.
3. High Density Fibreboard (HDF)

Image credit: Wikipedia
Also known as Hardboard, HDF is very similar in composition to MDF, yet is a much stronger and denser building material.
Likewise, it is an engineered wood product, mainly used in the manufacture of furniture as well as construction projects.
Similar in composition to particleboard and MDF, it’s constructed out of exploded wood fibres, which are compressed under high pressure in either a wet or dry process.
Unlike plywood, HDF is very homogeneous with no grain.
It has many applications, such as a substrate, and is commonly used in construction, flooring, furniture, home appliances, automobiles and cabinetry, making it a good alternative to plywood in these scenarios.
4. Oriented Strand Board (OSB)

Image credit: Amazon
OSB is a type of engineered wood panel made from wood strands oriented in specific patterns and then bonded together with adhesives.
It's commonly used in construction as a sheathing material for walls, roofs, and floors, as well as subfloors and underlays.
It's known for its strength, durability, and low cost compared to other building materials such as plywood, making it a very viable alternative.
OSB is also more environmentally friendly than other engineered wood products because it's made from fast-growing, renewable trees.
It also uses less energy and chemicals during production.
5. Particle Board (Chipboard)

Image credit: Rotor DB
Particleboard, also known as chipboard, is a type of engineered wood made from particles and fibres bonded together with a synthetic resin under heat and high pressure.
The particles used to make chipboard are typically small, ranging from sawdust to tiny wood chips, and are often made from low-grade or waste wood that would otherwise be discarded.
Particleboard is widely used to make furniture, as well as the construction industry as a cheaper alternative to plywood.
It's commonly used for shelves, cabinets, and tabletops, as well as subfloors and wall panels.
Furniture products tend to be made from a laminated melamine faced chipboard, to give them better strength and aesthetic appeal.
Particleboard has several advantages over plywood, including its uniformity, stability, and low cost.
However, it's less durable than plywood and can be prone to swelling or warping when exposed to moisture.
Importantly, some types of particleboard contain formaldehyde, which is very harmful to human health, so should be used with caution.
6. EKO Ply

Image credit: EKOply
EKO ply is a relatively new product to hit the construction materials market, and could be a game changer.
Made from 100% recycled plastic, this plywood alternative is one of the most environmentally friendly and economical choices available.
Made purely from recycled material with no organic products whatsoever, EKO ply is fully weatherproof, extremely tough and durable with low maintenance, non-toxic and easy to cut and screw.
As the name suggests, it’s fully intended as a full fledged plywood alternative and could be ideal for your next project if you’re unable to source or use traditional timbers plywood.
7. Solid Wood

Image credit: Unsplash
It may seem like an obvious choice, but using real solid wood instead of manufactured plywood could be a very suitable alternative.
There’s a number of benefits to using solid wood instead of plywood which you may not have considered.
For starters, it’s much more attractive with its real character and grain.
It can be used in a variety of ways, as well as cut and shaped as desired.
But for the environmentally conscious individual, this may not be the ideal choice, since it’s far less sustainable and tends to produce far more waste.
8. Fibre Cement Board

Image credit: JT Dove
Fibre Cement Board is made from a mixture of cement, cellulose fibres, and other additives.
The resulting product is strong, durable, and resistant to fire, moisture, and insect infestation.
It's commonly used in construction applications such as sidings, roofs, and floors.
The manufacturing process of Fibre Cement Board involves mixing cement, sand, and water with a wood pulp or synthetic based cellulose.
The mixture is then formed into sheets using a mould or a Fourdrinier machine.
The board is then pressed and cured, which results in a dense, hard material.
Known for its strength, durability, and versatility, Fibre Cement Board can be cut and shaped into different sizes, making it a popular alternative to plywood in a variety of construction projects.
Finally, Fibre Cement Board is also very environmentally friendly, made from sustainable materials with no harmful chemicals or toxins.
9. Fibreglass (GRP)

Image credit: Amazon
Fibreglass, also known as Glass Reinforced Plastic, is a type of reinforced plastic material made by weaving or knitting glass fibres together to create a fabric-like structure.
The fibres are usually made from molten glass that's drawn into thin strands, and then woven or knitted into a mat or fabric.
Fibreglass is a popular alternative to plywood for a variety of applications, including construction, automotive parts, marine products, aerospace and sports equipment, to name a few.
It's used for its strength, durability, and resistance to corrosion, as well as its relatively low cost and ease of fabrication.
Fibreglass can be moulded into various shapes, and can also be combined with other materials, such as resins, to enhance its properties.
It's often used as a composite material, where it’s combined with other materials to create stronger and more lightweight structures.
10. Masonite

Image credit: Travis Perkins
Masonite is a type of hardboard made from wood fibres that have been compressed under high pressure and heat, and then bonded together with synthetic resins.
It got its name from the Masonite Corporation, which was one of the first companies to produce this type of hardboard at mass scale.
Masonite is known for its strength, durability, and smooth surface, which makes it a popular alternative to plywood for a variety of applications.
It's often used in construction for interior and exterior doors, wall panels, and as a substrate for roofs and floors.
It's also used in furniture making, cabinetry, and other wood products.
Masonite can be treated with additives to enhance its resistance to moisture, fire, and other environmental factors.
One of its other advantages is that it's made from renewable wood fibres, making it a more sustainable alternative to other types of building materials.
11. High Density Polyethylene (HDPE)

Image credit: Piedmont Plastics
High Density Polyethylene (HDPE) is a type of plastic polymer that's commonly used in the production of various products and packaging materials.
It's made by polymerising ethylene gas under high pressure and temperature, which results in a high molecular weight, high density polymer.
HDPE is known for its strong, durable, and impact-resistant properties, as well as its resistance to moisture, chemicals, and UV.
It's used in a wide range of applications, including the production of plastic bottles, pipes, cable insulation, and packaging materials such as food containers, and shopping bags.
So it's only a suitable alternative to plywood in very specific applications.
One of the advantages of HDPE is its relatively low cost and easy to manufacture.
It's also widely recyclable, making it a more sustainable alternative to some other types of materials.
12. Bamboo Plywood

Image credit: Wood Guide
And finally, we have Bamboo Plywood, which could arguably be the best alternative, and closest equivalent to timber-based plywood.
First of all, bamboo plywood is made from 100% renewable bamboo, using emissions free adhesives, making it a very eco-friendly choice.
It’s strong and very durable, making it a great material which will most likely outlast its wood-based counterpart.
As a raw material it’s ideal because it’s inexpensive, fast-growing, and widely available.
It can be used for a wide variety of applications including flooring, ceiling, walls, doors, fences, and roofs, making it an amazing alternative to plywood.
So, could bamboo ply be the answer to this question? Very possibly.
Pros & Cons of Plywood
Plywood has a number of advantages and disadvantages that affects its suitability for various construction projects.
Below we have listed the most common pros and cons:
Strength & Durability
Plywood is stronger and more durable because it’s made from multiple layers of thin wood sheets glued together in opposing grain directions.
This cross-grain construction gives plywood its high strength and dimensional stability.
Range of Applications
Plywood can be used for a variety of purposes, including construction, furniture making, and crafts.
It comes in different thicknesses, grades, and finishes, making it suitable for different applications.
Resistant to Warping & Cracking
Generally speaking, plywood is less prone to warping, cracking, and splitting than solid wood because it's made from several layers of wood that are glued together under high pressure.
Easy to Use
Plywood is easy to cut, shape, and sand, making it an ideal material for woodworking projects.
It can also be painted, stained, or laminated to get a desired finish.
Cost
Plywood can be more expensive than other alternative products, especially if you opt for high-quality marine ply or specialised finishes.
Environmental Impact
Plywood is made from wood, which naturally raises concerns about deforestation and the depletion of natural resources.
However, plywood made from sustainable sources can be a more environmentally conscious option.
Limited Aesthetic Appeal
Plywood lacks the natural beauty and character of real wood.
It can look dull and lifeless unless finished with a veneer or high end varnish.
Prone to Moisture Damage
Standard plywood can be vulnerable to moisture damage, especially if left unsealed.
Over time, it can warp, swell or delaminate if exposed to moisture or high humidity levels.
Conclusion
So there you have it - our complete breakdown of plywood alternatives.
From the materials listed above, we’re sure you’ll find a suitable alternative that will give you just as good, if not better results than traditional plywood can.
In some cases, the alternatives may be cheaper, stronger, more durable and more versatile than plywood.
So take a look and give one a try!
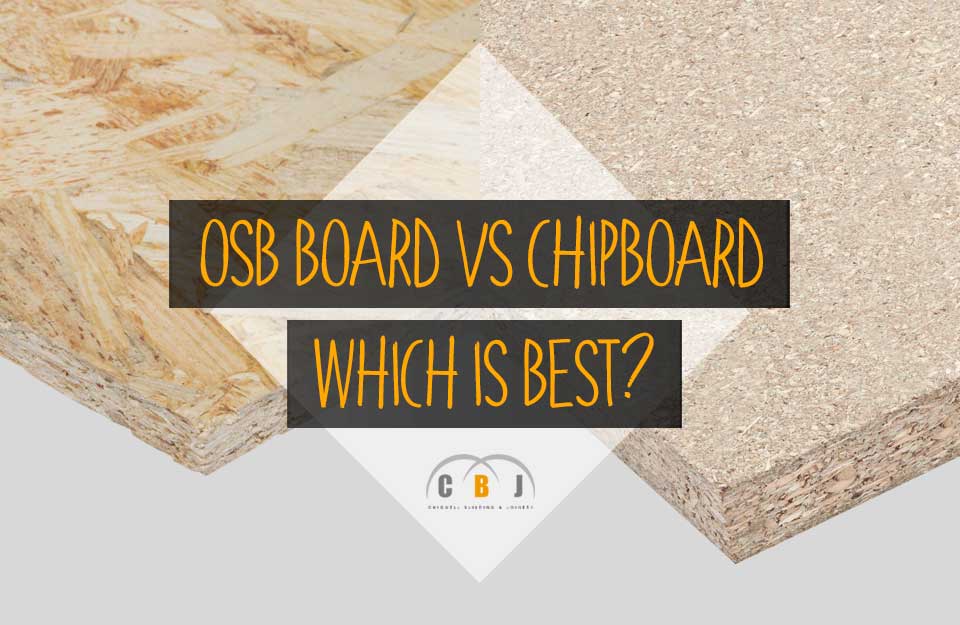
OSB Board vs Chipboard - Which is Best?
Author Chigwell Building & Joinery
Date 01/04/2023
Constructing any form of building is a monumental task in every way, from contractors, to architects, to tool choice and permits from local authorities.
One such dilemma is choosing the right type of material for subfloors, roof underlayment and other solid surfaces.
OSB (oriented strand board) and chipboard are two highly popular choices in interior construction.
This article compares OSB and Chipboard and explains which is the better choice of the two.
Table of Contents
What is a Substrate?
A biological substrate is an underlying substance or layer upon which an organism or object can grow.
However, in construction terms, a substrate is merely a supporting layer to the primary material layer.
Regarding OSB, the substrate is wood strands compressed horizontally and laterally in alternating layers.
OSB and chipboard can be defined as substrates as they are not naturally occurring wood products.
What is OSB Board?

OSB Board. Image credit: Wikipedia
OSB (Oriented Strand Board) is wood made from perpendicular layers of wood glued together using high pressure and resin.
The strands in the OSB board are generally flat and rectangular, arranged in perpendicular layers.
OSB particles are fixed in place using waterproof adhesives and resin for the final, pre-polished product.
OSB is a cheaper alternative to plywood, with similar strength and durability but a significantly lower cost.
OSB Particle Shape
Their particle shapes can define OSB and chipboard.
The uniquely long, thin wood particles used to make the material define OSB.
Chipboard is defined by the shorter, square chunks used to construct the material.
While breaking apart building material is inadvisable, examining the fresh-cut edge of either material reveals the distinct difference.
OSB Board Structure
OSB and chipboard feature different board structures.
OSB is composed of resin-impregnated wood strips arranged in parallel layers.
Additionally, OSB panels are heat-sealed on all edges to ensure durability.
Chipboard panels are wood particles mixed with resins.
The mixture is dried and fed to a board chipper.
The resulting powder combines with more resin and is molded, pressed, and dried.
Typical Uses of OSB
OSB is typically used in construction as floor or wall sheathing.
It is an inexpensive, effective and strong construction material.
Chipboard is an excellent material for bespoke wardrobes, dressers, nightstands, headboards, and more.
In addition, chipboard is an ideal material in attic flooring or rooms where comfort and aesthetics are not a concern.
OSB Pros & Cons
Chipboard and OSB have their pros and cons.
OSB is cheaper to manufacture than traditional wood flooring or chipboard.
However, its ability to retain moisture raises mould and warping concerns, particularly in warm climates.
Chipboard is a cheap building material used in household fixtures or flooring.
However, chipboard is less durable than traditional wood due to its construction and is prone to splitting or cracking when cut or placed under heavy pressure.
What is Chipboard?

Chipboard. Image credit: Wikipedia
Chipboard is a cheap and readily available building material constructed from wood chips and resin.
Chipboard is created by binding wood chips with resin and pressing the mixture under high pressure into molds.
Sawdust and recycled wood are used for chipboard in other applications.
Chipboard is a non-ideal building material in wet climates due to its tendency to retain moisture.
Unfortunately, that provides the potential for rot to set in.
However, chipboard is ideal for furniture construction in dry climates due to its strength and durability.
Chipboard Particle Shape
Chipboard can have many different particle shapes.
However, the most common particle shapes for chipboard are longer, rectangular wood chunks.
Sawdust or recycled shredded wood are frequently used to make chipboard.
OSB must be moulded in specific layers, yet chipboard can be made from shredded wood.
Chipboard is therefore an excellent method of reusing old wood chunks.
Chipboard Structure
Chipboard is small wood particles mixed with resin, then allowed to dry in pressed molds.
The structure of the board will depend on the particle size.
Bigger wood chips yield a more chunky design if cross-sectioned, while sawdust chipboard will appear smoother.
Typical Uses of Chipboard
Chipboard is a common material in furniture and interior home accents, which is protected by a veneer.
Chipboard can be found in kitchen countertop structures, soundproofing, and packaging.
While chipboard requires vinyl or formica edge banding or coating as a veneer, chipboard is also popular when the top layer is polished and clear-sealed.
When painted, chipboard is a strong, low-cost furniture material - think IKEA!
OSB is generally found in home construction but is also used in furniture.
Typically, OSB is used in underfloor layers, wall sheathing, roof covers, and i-joists in commercial and residential buildings.
However, OSB will be used in furniture frames, decorative paneling, pallets, and packaging.
While mainly intended for commercial and residential construction, OSB is another viable alternative to chipboard and traditional plywood.
Chipboard Pros & Cons
OSB and chipboard are valuable materials.
However, they have positives and negatives, as with any building material.
OSB is a cheap, light, and robust alternative to plywood.
Therefore, OSB is an excellent material in commercial and residential construction.
However, OSB absorbs and retains moisture exceptionally well, making it susceptible to rot in humid climates.
When using OSB in humid areas, 1/8 inch minimum spacing between boards allows for swelling and expansion.
Chipboard is a solid alternative to plywood or OSB due to its low cost, strength, and durability.
Chipboard is excellent for furniture frames, countertop foundations, paneling, or recreational equipment frames.
Additionally, chipboard is made from 70% recycled materials and is considered more environmentally friendly.
However, chipboard has disadvantages compared to plywood.
Chipboard retains moisture exceptionally well, making it unusable in wet conditions due to swelling.
Additionally, chipboard responds poorly to cutting, often leaving jagged edges or missing chunks.
Finally, the particle shapes respond poorly to saw blades.
Chipboard is also prone to cracking and splintering when using fasteners, making it a problematic building material.
Key Differences
OSB and chipboard are both decent plywood alternatives.
They are much cheaper and equivalent in strength in certain settings.
However, they have fundamental differences.
OSB comprises long, narrow wood chunks laid in perpendicular layers and bound with resin and waterproof adhesives.
Chipboards are molded from wood chips, sawdust, or recycled wood; which are inserted into a shredder, then bound with resin.
OSB is better for residential or commercial construction, while chipboard is best for indoor finishing.
Conclusion
As you will have discovered, both OSB board and chipboard are two very adaptable and useful building materials.
But the key differences between the two are how they can be used and where they can’t.
OSB board is most certainly the most adaptable of the two and tends to be used in its original state for underlayments and substrates in buildings.
Chipboard however tends to be used to construct furniture yet requires a protective veneer to keep moisture away.
So in answer to the question, which is best? The simple answer is neither.
It greatly depends on your intended use and the lifespan you expect from the material.
Both are both affordable and excellent choices in the right setting.
Used incorrectly, and they will both expose their flaws.
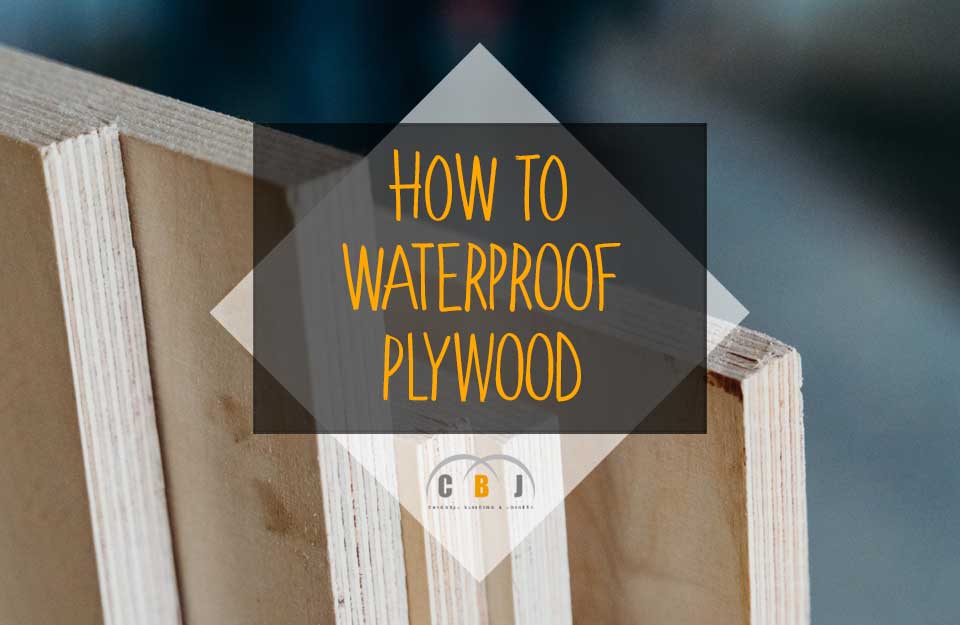
How to Waterproof Plywood
Author Chigwell Building & Joinery
Date 01/02/2023
Plywood is an engineered, layered wood sheet that comes in various thicknesses. The veneers are glued together adjacently, with its grain rotated at 90º on each layer.
It’s manufactured using a cross-graining technique that helps to reduce splitting and creates a strong, consistent panel.
While plywood has been widely adopted for various construction uses, one major flaw is its low resistance to excess moisture exposure.
We've put together this useful guide to help you successfully waterproof your plywood so that it lasts much longer, even in moist environments.
Table of Contents
- Is Standard Plywood Waterproof?
- Can You Make Plywood Waterproof?
- Can You Buy Waterproof Plywood?
- Benefits of Waterproofing Plywood
- How to Waterproof Plywood
- Surface Preparation
- Epoxy Sealer
- Woodcon
- Hardwax Oil
- Liquid Latex
- Marine Sealer
- Polyurethane Varnish
- Water-Based Stain
- PVA
- Sealing the Edges
- Conclusion
Is Standard Plywood Waterproof?
Standard birch plywood sheets are not waterproof!
It’s a great wood for home construction as its laminated structure offers more stability than other sheet timbers.
However, prolonged exposure to moisture will cause the plywood to delaminate, soak up moisture and swell - eventually destroying the wood’s structural integrity.
In fact, the type of adhesive used to bond plywood is the cause of its low moisture resistance.
Most plywood manufacturers use urea-formaldehyde because of its low cost, its availability and resistance to microorganisms that may destroy the wood.
But its high water solubility is the plywood's major disadvantage.
Over time, exposure to water will cause the individual layers of the plywood to split and the glue to disintegrate.
Can You Make Plywood Waterproof?
You can waterproof standard plywood by following the simple steps outlined in this article.
The plywood cross-grain finish and urea-formaldehyde make it very receptive to waterproofing materials like paint or sealant.
Urea-formaldehyde glue has high water solubility, absorbing liquid-like paint applied to the surface.
Also, its cross-grain finish creates a rough surface that prevents paint or sealant from slipping away when applied.
While waterproofing plywood means applying a waterproof substance to its surface and around its edges, many techniques and substances may be employed depending on your available resources.
Can You Buy Waterproof Plywood?
There are many brands of waterproof plywood available in the market.
One thing to note is that these waterproof plywoods are not all of the same quality.
Plywood is available in three types:
- Commercial Plywood.
- Boil Water Resistant (BWR) Plywood.
- Marine Plywood (also called Boil Waterproof).
For waterproof plywood, we recommend purchasing marine plywood for general use.
But the quality of the plywood will depend on the grade you get. There are three grades in the United Kingdom:
Class I
These are plywoods designed for interior use and less humid environments. (Examples are commercial plywood.)
Class II
This plywood is designed for interior use but has a level of moisture resistance and resistance to humid environments like the kitchen and bathroom. (Examples are the BWR plywood.)
Class III
These plywoods are designed for highly humid environments and perform well if exposed to water. It’s great for outdoor use.
Benefits of Waterproofing Plywood
If you've read thus far, you've probably gotten a sense of the advantages of utilising waterproof plywood.
Here are some ways that waterproofing your plywood may benefit you:
Prolonged Life
Exposing plywood to excessive moisture will destroy the wood very quickly.
Applying a waterproofing substance to your plywood can prevent the wood from warping, splitting or deteriorating.
Waterproofing substances add an extra layer of protection to your plywood, which prevents the wood from absorbing moisture, instead causing water to run off its surface.
In addition, this waterproofing material, like sealant or paint, will make the wood stronger than standard plywood.
Fully waterproofed plywood has an expected lifespan of around 10 to 50 years.
Prevents Dry Rot
Despite the name dry rot, it is caused by fungal growth from damp and high-humidity situations.
This virulent fungal infection in the wood can easily spread throughout the plywood and cause major damage.
Also, it is important to note that dry rot will affect plywood with a 20% moisture content.
Waterproofing strategies that help reduce moisture content in the wood or eliminate it must be employed to prevent dry rot.
The fungus will struggle to survive outside damp areas or surfaces.
Prevents Wet Rot
One of the most common causes of plywood deterioration is wet rot, which is caused by exposure to water.
Wet rot may not always cause the wood to crack, but it can cause the plywood to swell and lose its structural integrity.
Plywood rot not only looks ugly, but it also smells horrible, and when this happens, the plywood must be removed since it no longer serves its purpose.
Wet rot may be disastrous for your property's interior or exterior.
Waterproofing your plywood might spare you the trouble of dealing with a slowly deteriorating plywood panel caused by wet rot!
Prevents Warping
Warping destroys plywood!
When plywood warps, it simply means that the moisture content of the different layers of the wood is uneven, causing major bending, deformity and structural disintegration.
For instance, when one part of the plywood dries faster than the other, the dried section shrinks and causes the wood to warp.
Using waterproofing materials such as polyurethane provides a nonporous seal for your plywood.
It’s an excellent technique to prevent warping, as it reduces the amount of moisture the wood absorbs.
Prevents Splitting
Moisture and humidity will cause the plywood to expand, leading to splitting.
The most effective wood splitting solution is to eliminate the moisture that the wood can absorb.
Most waterproofing materials provide an excellent layer of protection and a nonporous seal to the plywood, preventing it from absorbing moisture.
Furthermore, a thoroughly sealed plywood surface keeps the wood compact and stable, preventing fungus from developing or wood expansion.
Waterproofing your plywood before use is the perfect technique for staying one step ahead of this situation.
How to Waterproof Plywood
There are various ways to waterproof plywood.
However, it’s important to consider available resources, the cost, the size of the wood and other factors before you choose a suitable application.
Before treating your plywood, it’s best to wear safety clothing such as glasses and gloves.
In addition, you should work in a well-ventilated area to prevent breathing excessive fumes and follow the manufacturer's directions exactly.
Surface Preparation
Materials
- Sandpaper
- Rag or cloth
- Mineral Spirit
- Primer
Step 1
Prepare the plywood by wiping it clean with a cloth. You want to ensure there are no particles or stones on the surface of the wood.
Step 2
Depending on the grade of plywood you have, gently sand the surface until reasonably smooth.
Grade A plywood does not need sanding, but grade B or other lower grades will need their surfaces sanded.
Step 3
Wipe the surface of the plywood with a rag soaked in mineral spirit. Ensure there is no saw dust left on the surface.
Lastly, apply a primer on the surface using a brush or roller and leave it to dry.
Here's some of the best techniques to waterproof your plywood:
Epoxy Sealer
Epoxy sealer is a glossy protective film or coating applied to the surface of the plywood.
It forms a hard, abrasion resistant coating, and produces a longer-lasting surface than most waterproofing methods.
In addition, its nonporous coat means that the plywood doesn’t trap moisture, instead allowing for water to roll away from its surface.
Epoxy sealers are available in spray and paint versions and are known to make the plywood surface stronger.
Tools
- Roller
- Stock 3" inch foam brush
- Chip brush
- Pair of gloves
Step 1
Pour and measure resin and hardener into separate containers.
There are different resin-to-hardener ratios, depending on the type of Epoxy used.
Ensure you mix the right ratio.
Pour the hardener and resin into separate cups to get the right measurement.
You can get the correct ratio on the package label - for example: 2:1, 1:1 or 3:1.
While mixing the resin and hardener, ensure you’re wearing protective gloves.
Step 2
Mix and stir the resin and hardener in a single container.
After getting the right ratio in a separate cup, you can mix the components together by pouring the resin into the hardener or vice versa.
Use wood or plastic to stir the mixture for at least five minutes.
If you notice bubbles in the mixture, it can easily be removed by heating the surface of the plywood.
Step 3
Pour the mixture on the centre of the plywood and spread using the foam brush.
Pour the mixture carefully on the centre of the plywood, and spread it using a foam brush.
You don't need to worry too much about even spreading as it’s the first layer.
You will need to act quickly as the mixture will harden quickly.
Step 4
Get rid of the bubbles with heat.
After applying and spreading the Epoxy across the surface of the plywood, you may notice small bubbles on the surface.
You can eliminate these bubbles by applying heat from a hair dryer.
Ensure it’s at least 7 inches from the epoxy surface and move it over the wood until the bubbles disappear.
Step 5
Apply another layer of Epoxy.
Let the first layer of Epoxy dry for at least 5 hours before applying another layer.
Pour the mixture on the centre of the wood, and spread evenly using a spatula.
Continue to spread until you achieve the desired flatness and smoothness across the plywood surface.
Leave the plywood to dry for a minimum of 24 hours, although 36 hours is recommended.
Woodcon
The Woodcon technique forms a layer of transparent water repellent coating on the surface of the plywood.
In addition, Woodcon offers fire retardant benefits, which means it's less likely to burn.
It's easy availability makes it a popular choice of waterproofing across the United Kingdom.
Furthermore, it can be applied using a paint brush, roller or sprayed across the surface of the plywood.
Hardwax Oil
Hardwax oil is an excellent nonporous sealant that helps to waterproof plywood.
It’s made of a mix of vegetable oils and wax, with additional chemicals such as volatile organic compounds, colouring, and drying agents.
In addition, the substance provides additional aesthetic appeal when applied to the plywood, forming a plastic-like layer on the wood.
It also helps the wood last longer, making it resistant to wear and water-repellent while keeping the wood’s natural moisture inside.
Here's how it's done:
Step 1
Clean the plywood thoroughly to eliminate any dirt and dust.
If entrenched stains need to be removed, use a clean wipe with a small amount of dish soap or cleaning solution.
Step 2
After that, wipe away any remaining cleaning product.
If some stains are particularly difficult to remove, you can lightly sand the surface of the plywood.
Step 3
After thoroughly cleaning the plywood and removing any cleaning product traces and leftover sawdust, apply an even layer of the hardwax oil, following the product instructions carefully.
Step 4
Allow at least 4 - 6 hours, preferably overnight, to dry.
If you used hardwax oil for the floor, you must wait at least 16 hours before allowing people to walk over it.
Liquid Latex
Liquid latex, also known as liquid rubber, is another inexpensive but effective technique to waterproof plywood.
It comes in spray cans or paint solutions, and is available at local DIY stores.
When applied to the surface of your wood, it provides a layer of waterproof protection.
If you want to waterproof a small sheet of plywood and have a limited budget, then liquid latex technique is best.
Here's how it's done:
Step 1
Remove dust and debris from the plywood's surface using a clean cloth and some detergent.
If you prefer, you can use a 50/50 mixture of water and vinegar to achieve a streak-free finish.
Step 2
Once the plywood is clean and dry, with no traces of cleaning agent, you can apply the liquid latex with a clean paintbrush or roller.
Make sure to apply it in a smooth, even layer whether you spray, brush, or roll it on.
Step 3
After applying the liquid latex, allow the plywood to dry for an hour or so.
It should dry fairly quickly.
Marine Sealer
Marine sealers are excellent for plywood exposed to excessive moisture, like boats and sea vessels.
It produces an air-tight layer over the wood surface.
Step 1
All surfaces of the plywood should be cleaned before applying the sealant.
Step 2
Remove old coats, debris and other materials on the wood.
Step 3
Carry out an absorbency test by sprinkling water on the plywood surface.
If the water doesn’t get absorbed quickly, stripping the wood is necessary.
Avoid applying in hot temperatures of above 950F, or if rain is expected within 15 hours.
Thoroughly mix and stir the marine sealant.
Test on a small section before proceeding to apply over the wood surface.
Apply the first coat using a synthetic paintbrush or spray.
Apply the next coat at least an hour after the first coat.
Allow at least 12 to 24 hours to dry naturally, depending on the temperature.
Polyurethane Varnish
Polyurethane varnish is a tough coat that can be used to add a layer of protection to plywood.
It’s available in water, solvent and oil-based types, with its water production containing less volatile organic compounds (VOC).
Polyurethane varnishes protect materials like plywood from moisture and harsh weather conditions.
You will require the following:
- A small paintbrush
- Tape for masking
Also, don't forget to wear protective gear, as polyurethane contains incredibly harmful chemicals like carbon monoxide and hydrogen cyanide.
Make sure to apply the polyurethane varnishes around the edges of the plywood, as these are most susceptible to absorbing water.
Here's how it's done:
Step 1
Using a brush, apply a coat of varnish to the plywood's edges. Avoid getting varnish on the surface of the plywood.
If varnish gets on the surface of the plywood, it will prevent the wood from absorbing any future treatment/product.
Cover the plywood completely with masking tape, leaving only the edges, to prevent the varnish from getting onto the surface.Step 2
After painting the varnish onto the edges and following the manufacturer's drying time guidelines, apply another 1 or 2 coats to the edges, allowing for drying time between coats.
Water-Based Stain
Water-based stains are a great way to waterproof plywood.
It offers deeper penetration into the wood than oil-based stains, resulting in a deeper and rich colour with the first coat.
Other fantastic advantages of using a water-based stain for waterproofing include the following:
- Low odour compared to other techniques
- Fast drying
- Less volatile organic compounds (VOC)
- Available in both spray and hand application
- Prevents UVA sun damage
You will need the following supplies:
- Water-based pigment stain
- Cotton rags
- A spray bottle with a pump
Step 1
Apply an even layer of staining product to the entire surface of the plywood using a spray bottle or a disperser provided by the manufacturer.
Step 2
After spraying the entire surface, use a clean rag to remove any excess stain.
Water-based stains only provide a light finish, so don't expect to see dramatic or noticeable colour changes.
Step 3
Allow the product to dry thoroughly according to the manufacturer's instructions on the stain packaging, and don't be tempted to shorten the drying time!
Wait 24 hours after spraying the treated plywood. For best results, allow it to dry completely. When you're sure it's completely dry, apply another coat or two to your liking.
PVA
This is a type of glue that has traditionally been used for bookbinding. PVA has every property that a waterproofing material should have.
It dries clear and thin, adheres nicely to plywood, and is entirely waterproof.
If you wish to seal plywood with PVA, dilute it with water, so it goes on smoother and soaks into the board a little before drying.
Sealing the Edges
To seal the edges of the plywood, do the following:
Apply several coats of varnish around the edges.
Ensure the varnish dries for at least 2 hours.
Since the edges absorb the varnish rapidly, you'll need to apply extra coats to ensure that it cures to produce that protective coating you want.
Conclusion
Waterproofing plywood will help you protect it against warping, rotting and other damage caused by excessive moisture, high humidity and environmental conditions.
The process of waterproofing can be done easily if the steps listed in this article are followed correctly.
Also, an added benefit to the plywood is that it makes it last much longer.

