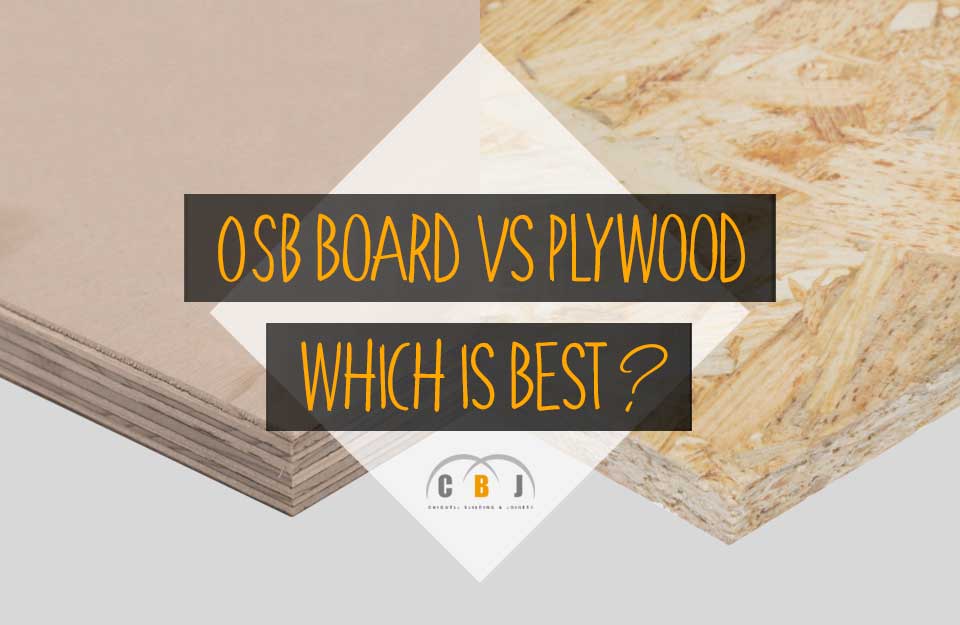
News


Which Kitchen Cabinets are Best?

Author Chigwell Building & Joinery

Date 01/04/2022

Whilst you design a kitchen, you will need to make an important decision - which type of kitchen cabinets should you choose?

You want a material that can offer you quality and durability, but also be within your budget.

The following guide should offer you some insight about different types of kitchen cabinets you could consider, along with their respective pros and cons.


Table of Contents

  1. Kitchen Cabinet Materials
  2. Kitchen Cabinet Construction
  3. Standard Unit vs Bespoke Cabinets
  4. Kitchen Cabinet Style
  5. Fixtures & Fittings
  6. Conclusion

Kitchen Cabinet Materials


When it comes to kitchen cabinet materials, there is a wide range of options.

You will need to take into account the density of the material in particular, as this will have a considerable impact on their lifetime.

Melamine Faced Chipboard (MFC)

MFC is the most basic material you can opt for.

It is one of the most affordable options, and yet it is relatively strong.

The chipboard core is composed of scrap wood, sawdust and paper.

It is then faced in a melamine laminate.

The surface is moisture resistant.

However, it is important to avoid moisture getting in because even if the carcass is generally well sealed to prevent the possibility of expansion, it is still best to be careful.

Medium Density Fibreboard (MDF)

MDF is a popular option.

It is considered to be somewhat better than chipboard, and it is generally slightly more expensive than MFC too.

The main reason for this is that MDF is denser and more durable.

It also has a smoother and more moisture-resistant edge.

MDF is made from felted wood fibres.

These are bonded together by means of extremely high pressure.

MDF is free of saps and knots, and one can find various finishes to choose from.

Veneered MDF

Another variety of MDF is Veneered MDF.

This consists of MDF boards which have been improved with a thin veneer of timber applied on either one or both sides.

This reduces the chances of warping and gives a nice look to the cabinets which will look as if they are made from a single piece of wood.

Plywood

Plywood is made from layers of hardwood which run both lengthwise as well as crosswise, thus making it stronger.

It is a stable and solid material which is often used by bespoke cabinet makers.

Plywood is very resistant to damage such as dents, dings and blow-outs.

One can also find MR ply, which is moisture resistant.

This is important especially for a kitchen, particularly in close proximity to the sink and taps.

Plywood is generally faced with birch or oak. It can also be laminated or painted.

In many cases the cabinet boxes are built either of plywood.

For robustness purposes, cabinets that have full plywood sides and backs are the best.

This is because they will be better able to resist any damage caused by moisture as well as better handle the weight of the countertops.

Solid Wood

Kitchen cabinets can also be made from solid wood.

However, it is worth noting that this is not such a popular option for the carcasses as they could warp over time.

Other than that solid wood such as solid oak and beech are considered to be popular options as they are durable and of superior quality.

Kitchen Cabinet Construction

The type of cabinet construction you are going to opt for is another key decision.

Flat Pack

Flat pack kitchen carcasses are inevitably cheaper and easier to transport and store.

As a result, they will cost much less than solid carcasses.

These are generally made on a CNC machine, and consequently all holes and screws will line up.

Hence they are very easy to assemble.

Flat pack carcasses may be cheaper.

However, it is important to note that the cost of assembly will need to be factored in, unless you are willing to see to it yourself.

Speaking of installation, there is a higher risk that this could be done incorrectly.

As a result, the joints will be less solid.

In some flat packed kitchens, the joints are wooden dowels that are glued into holes, or secured in the holes by means of two or three screws.

In both cases, one cannot really say that they are that strong.

However, if the wooden dowels are secured in holes by means of two sets of metal studs and cams, they will be considerably strong as the dowel will be well secured in place.

There is also the problem that if there are any missing parts there will be problems as well as delays.

Solid

Solid or rigid carcasses are structurally better.

They will also be fitted quite easily.

Generally if one is looking for less downtime between removing an old kitchen and having a new kitchen fitted, rigid carcasses are preferred.

There is also much less risk that there will be missing parts or components, and so delays can be avoided.

Standard Unit vs Bespoke Cabinets


Image source: Pexels

Many kitchen companies nowadays offer a kitchen with standard units, available in diverse sizes.

Carcasses are generally made in standard European sizes which are labelled by width, such as 300mm, 500mm, etc.

The main advantage of standard units is that they will generally conform with appliance sizes, making it easy to fit them in the cabinets.

Alternatively, you may wish to opt for a kitchen manufacturer who will be able to design and make bespoke cabinets.

In this case the carpenters and joiners will be able to fit the cabinets according to the requirements of your room.

Needless to say, if you opt for bespoke cabinets you will need to be willing to pay a bit more.

However there is the advantage that you have more freedom of choice and greater flexibility.

Kitchen Cabinet Style

There are various styles you may wish to consider for your kitchen cabinets.

Shaker

This is probably the most timeless option.

The cabinet doors will be solid and painted, featuring a frame and veneered centre panel.

There are inevitably several different colours that you can choose from, depending on your particular preferences.

Be it a fresh white, cream or soft pastel colours, or relatively cooler tones such as blue or green, the sky is your limit with shaker kitchen cabinets.

Slab

Slab kitchen cabinets consist of a smooth canvas which is then customised according to one’s preferences and budget.

A matt finish over gloss is a popular option as it calls for little maintenance.

Slab door designs which are handleless are becoming quite popular.

They are easier to keep clean and look smooth and sleek, which is a style many prefer.

High Gloss

High gloss finishes are considered to be favourites too.

With flowing lines, and free from any fussy features or finishes, high gloss cabinets stand out with their colours and finishes.

Fixtures & Fittings


Image source: Dowsing & Reynolds

Sometimes the importance of planning for the fixtures and fittings goes underestimated.

The plinths or kick-boards for instance, are important as these will ensure that the unit legs are covered.

These will run all along the floor beneath the kitchen units.

Higher up, you will need to think of the cornices.

These will make the upper frame look neater as they will hide the cabinet tops.

The drawers and runners are very important.

You should consider how these will be located, so as to have a neater layout.

It will also ensure that any items stored within do not end up going all the way to the back and be hard to locate.

It is recommended that you always check the load capacity of the runners as this will affect the size of the drawers.

Inner storage solutions are another important consideration.

Nowadays there are a variety of options, some of which are functional as well as decorative.

Some ideas include corner storage carousels, pull-out swing ladders and wicker drawer baskets.

It is also a good idea to consider soft close cabinet hinges to safeguard the doors and drawers from getting damaged in case they are slammed shut a bit too forcefully.

Such hinges and runners are not expensive and so they are worth considering.

Last but not least you will need to choose the handles or knobs.

You may also wish to consider bars.

Otherwise there is also the option to go completely free of any handles too of course!

Conclusion

While traditionally solid wood used to be considered as one of the best materials for cabinetry, nowadays there are other options.

Engineered wood products are considerably reliable as well as more affordable.

There are also numerous fixtures and fittings to choose from, and needless to say, countless styles too.

While the aesthetic features of cabinet doors are important, it's highly recommended that you pay close attention to the properties of the materials used as well as the interior construction of the cabinetry.

Indeed, while the doors are the most visible and character-defining parts of the kitchen, the structural body of the cabinets is of great importance too.


What is High Pressure Laminate (HPL)?

Author Chigwell Building & Joinery

Date 08/03/2022

In the past, plastic laminate was very popular due to its various positive attributes.

Later, High Pressure Laminate (also known as HPL) was introduced to the market.

One can say that HPL is a descendant of the original plastic laminate as both have various things in common, but with some added benefits.

Read on to find out more, or use a jump link below to skip to a desired chapter:


Table of Contents

  1. What is HPL Board?
  2. How is High Pressure Laminate Made?
  3. Properties of HPL Board
  4. Types of High Pressure Laminates
  5. Typical Applications for High Pressure Laminate
  6. Conclusion

What is HPL Board?


High Pressure Laminate board is a decorative surface material which is considerably durable and resistant to wear.

HPL boards are also great in terms of their properties, as they are fire resistant and chemical resistant.

HPL is laminated to panels or boards by applying various adhesives.

Generally MDF or particle boards are used as they are considered to be ideal substrates due to their composition, stability and durability.

Some HPL can also be post-formed around the edges by applying heat.

High Pressure Laminate belongs to the high-tech group of high pressure decorative laminates.

The highly compact and aesthetically appealing composite sheet that results from the production process offers a highly resistant surface that is ideal for various applications.

How is High Pressure Laminate Made?


High Pressure Laminate is produced by saturating several layers of kraft paper with phenolic resin.

Afterwards, printed decor paper is placed over the kraft paper, and a pressing process commences.

Due to the heat and pressure applied, which exceeds 1000 PSI, the two become fused together.

Phenolic resin and melamine resin are thermoset plastics.

As a result, the curing process leads the resin to turn into plastic.

This happens due to a cross-linking process, whereby the paper sheets are converted into one laminated sheet which is considerably rigid.

This bonding process is strong and irreversible.

This is the main reason behind the durability of HPL boards.

Properties of HPL Board

The key properties of HPL boards are:

  • Fire resistant.
  • Heat resistant.
  • UV resistant and stable to light, thus its colour will not change or fade over time.
  • Moisture proof and infiltration resistant, as it is a highly hermetic product that prevents the penetration of water underneath the surface layer, making it a very stable option which is ideal to use when there could be environmental changes.
  • Chemical resistant.
  • Resistant to stains thanks to its surface consistency.
  • Anti-static and so it does not attract dust.
  • Durable and can withstand wear, including scratches, abrasions and impact.
  • Decorative and aesthetically pleasing, as there are various colours and finishes available on the market.
  • Easy to clean and virtually maintenance free.
  • Can be used both for indoor and outdoor applications.

These are some of the reasons why HPL is considered to be a good choice when compared to other materials.

In recent years, Double Belt Press processes are used to produce Continuous Pressed Laminate (CPL).

This is a decorative paper that is impregnated with resins which have been fused together with high heat and pressure.

The thickness ranges between 0.4mm to 1mm, and they come in various lengths or in the form of a continuous roll.

Another variety is the Flexible CPL.

In this case, flexible thermosetting resins are impregnated in the decorative paper.

Like CPL, these are fused together by applying very high heat and pressure with resin-impregnated backers.

However, this type is intended for formable decorative laminates such as edge banding and profile wrapping.

The thicknesses are between 0.2mm and 0.4mm.

Types of High Pressure Laminates


There are various types or grades of HPLs.

They are intended for different uses and for particular performance requirements.

General Purpose HPL

General purpose is the most common and widely used HPL board.

They are used both for horizontal as well as vertical surface applications.

The thicknesses range between 0.71mm to 1.22mm.

Postforming HPL

These can be formed around the curved edges by applying high heat and restraint.

The maximum thickness of this type is around 0.97mm.

They can be formed to very small radii of as little as 9.5mm.

Backer HPL

This type of HPL is used for backing, so it doesn’t include a decorative surface.

It tends to be slightly thinner than the decorative HPL varieties.

Backer also includes the regrind, that is reclaimed HPL that has had the decorative sheet sanded off.

Special Purpose HPL

Special purpose HPLs include laminates that are chemical resistant, fire-rated and electrostatic dissipative.

An example is cabinetry liners which have these properties and are very high-wear.

In order to increase the resistance of particleboard or MDF, HPL can also be applied.

Hence it not only helps to improve the aesthetic appeal thanks to its decorative value, but it also improves the physical performance of the substrate.

For instance, a standard shelf made from particleboard can carry 45 lbs per square foot.

This same shelf is however able to hold 85 lbs if it’s overlaid with HPL.

Typical Applications for High Pressure Laminate


Considering the various positive properties and advantages of High Pressure Laminate (HPL), it is used in various applications and products, including:

  • Furniture, especially cabinetry, to improve their aesthetic appeal.
  • Flooring and wall treatments.
  • Both horizontal and vertical surfaces, especially in high traffic areas such as in retail outlets, hospitals, clinics and hospitality settings.
  • Bench tops, tables, counters and much more due to the high level impact resistance of HPL.
  • The fact that it’s a non-porous surface and so easy to clean makes it ideal for applications where a high level of hygiene is necessary, such as laboratories, hospitals and kitchens.
  • Suitable for contact with food as it is hygienic and heat resistant.
  • Used both for residential as well as commercial applications.

Conclusion

With various colours and finishes to choose from, and offering a myriad of positive properties, HPL has become a very popular material.

It’s increasingly being used in a variety of applications, both indoors and outdoors.

Easy to clean and virtually maintenance free as it is highly durable and resistant, this material is a relatively recent innovation which is gaining considerable popularity.

One can safely conclude that it is a superior quality material which, thanks to its positive attributes, has gained a considerable advantage over traditional alternatives.


How to Cut MDF to Size Correctly

Author Chigwell Building & Joinery

Date 09/02/2022

Medium-density fibreboard (MDF) is a type of engineered wood which has gained a lot of popularity over the years.

It has some similarities to plywood, but it is considerably denser.

MDF is made by combining wood fibres with wax and resin binder using intense pressure and high temperatures.

Since it is quite dense it is important to be aware of the best tools and methods to use to cut MDF to size.

Let’s dive in and discover more about how to correctly cut MDF to size.


Table of Contents

  1. Safety First
  2. Straight Cuts in MDF
  3. Curved Cuts in MDF
  4. Cutting Holes in MDF
  5. Routing MDF
  6. Sanding & Finishing
  7. Conclusion

Safety First


Image source: Pixabay

It is important to take certain precautions to ensure your safety.

Bear in mind that since MDF is quite dense, you may experience some difficulty cutting it unless you use the right tools.

Moreover, as large quantities of dust are produced when cutting MDF, you need to wear proper attire.

This is especially true since it contains formaldehyde resins, which are quite hazardous.

  1. Wear thick, heavy-duty working gloves
  2. It is best to be wearing a long sleeved shirt to reduce the possibility of scratching yourself against the edges of the MDF or the saw blade. However, make sure the sleeves are not loose as you do not want to risk having them get caught in the saw blade while cutting.
  3. It is highly recommended that you wear a dust mask and safety goggles. While cutting MDF, there will be a lot of dust particles released into the air. These can easily get into your eyes and be inhaled unless you’re wearing a mask and goggles.
  4. It’s advisable to carry out the cutting process in a large and clear area. Doing this outside may be the best option if you do not have a garage. Otherwise, make sure to open any windows and doors so that there won’t be too much dust accumulating. Also cover anything close to the working area to protect them from the dust.

Straight Cuts in MDF


Image source: Pixabay

To make straight cuts you can use any one of the following tools and methods.

While electric tools or most hand held cutting tools such as the ones mentioned below will cut through MDF boards, the most important thing is that the blade used is carbide-tipped.

Since MDF has a very high glue content, a blunt blade will not cut clean edges.

Circular Saw

Using a circular saw is one of the most popular options to make straight cuts in MDF.

It’s best to use a circular saw which has a cutting speed of around 3,000 metres per second.

A blade which has at least 60 teeth, and which is around 14 inches wide is recommended.

If possible, the blade should have a carbide tip.

Position the circular saw so that the bottom of the saw blade is flush against the MDF board’s side.

Adjust the lever or saw’s depth knob and move the blade until the tip is sitting just below the MDF board.

For the blade to cut properly, it’s best to have the tip sitting between ⅛ and ¼ inches below the MDF board. Then, retighten the lever.

The MDF board is best placed on a large working table or a saw horse.

It is important that the part where you will be cutting is hanging over the edge of the surface area.

Afterwards, lock the MDF plank in place by using heavy-duty clamps.

Mark where you will be cutting the plank either with a pencil or by using some woodworking tape.

Double check the marked line using a tape measure, and make sure it is aligned by checking with an L-square or a level.

Line up the circular saw’s front to this line.

Then you can start cutting the MDF plank by pushing the saw through it.

Try to hold it steady, and make sure that the cutting speed is consistent.

Take it slowly, holding firm to avoid the saw vibrating or kicking whilst cutting.

Table Saw

A table saw is a good option to cut MDF to size.

This tool is relatively easy to use and can guarantee precise rip and cross cuts.

Having said that, a table saw is not as affordable and as easy to carry around as circular saws since it will be fixed on a motor underneath a table.

It is important to note that table saw blades come in varying sizes.

Most of them are 10 inches in diameter.

It is advisable to use a smaller blade relative to the maximum size that your table saw can handle.

A larger blade will not be easy to manage.

A 50-80 tooth per blade is recommended to cut MDF to size since it is a dense material.

The following are the main types of table saw blades that you can choose from to cut MDF:

  • Crosscut blades - with around 80-90 teeth these blades are ideal for MDF as they can cut through it properly and precisely.
  • Combination blades - this is a common option, with a 10 inch diameter and with around 50 teeth. This is an ideal blade for a beginner.
  • Composite blades - also known as multi-purpose blades, these have 60 teeth. You can rip as well as crosscut MDF.

Hand Saw

If you do not want to buy a circular saw or a table saw, you may simply opt to use a hand saw.

This is the most basic of saws available.

You will need to be very careful if you use it to make straight cuts on an MDF board as it is a difficult technique to be precise.

Only experienced carpenters or contractors can cut accurately with a hand saw.

Even if you mark the line where you intend to cut, it is quite hard not to veer off course.

Make sure you have a quality saw as MDF is a dense material.

The teeth need to be very sharp and the saw should have a thin kerf.

Mark the cut line, making sure it is highly visible all along.

Before starting the cutting process, get a straight edge and clamp it to the board, next to the cut line.

Ensure the board is well secured.

Make sure the clamps do not get in the way while you’re cutting.

It is recommended to score the cut line with a shard-edged knife to create a shallow guide cut for the blade to follow.

This will also help the blade’s teeth to cut through more easily.

When cutting, it’s best to start with a high angle to let the saw blade’s teeth into the groove.

Then, slowly bring the cut angle downwards till you cut through the board’s width.

Move the blade in a backward and forward motion, while gently pushing and pulling the saw blade against the straight edge.

All along, you need to ensure that the saw blade is brushing against the straight edge.

This will improve your chances of cutting through the MDF straight.

Once you have cut halfway through the MDF board, make sure that the free end is well supported so that it does not end up breaking off.

Then continue to cut until you complete the whole cut.

Laser Cutting Machine

Since MDF is so dense and with a faultless composition, it’s ideal for a laser cutting machine.

Lasers will be able to cut precise edges as well as engrave the MDF.

The result will be pinpoint accurate and consistent.

Laser cutting machines are rather expensive however.

It’s also worth noting that since the laser burns at high temperatures, it will evaporate the resin causing the MDF to emit poisonous formaldehyde fumes.

Hence, it’s crucial to make sure that safety precautions are taken should you use an MDF laser cutting machine.

Curved Cuts in MDF


Image source: Pixabay

To make curved cuts you may either opt to use a jigsaw or a rotary tool.

The more teeth the blade has, the less the possibility of chipping the MDF plank around the edges being cut.

As a result, a steel-cutting blade is generally recommended.

Here are the most recommended cutting methods respectively:

Jigsaw

For best results a jigsaw with a bi-metal cutting blade is the most suitable.

Carefully place the blade inside the device’s blade clamp mechanism.

A narrow blade with a lot of teeth is the best type.

Make sure the device is unplugged while installing the blade.

Set the MDF plank you want to cut on the work table securely.

Position it so that the area where the cutting will be made is hanging over the edge.

Place large clamps around its edges to fasten it in place, as you do not want it to move while you are cutting.

In case you are cutting in the middle of an MDF plank, it is best to place each end on a saw horse or a sturdy table.

Using a pencil mark where you want to cut.

A drafting compass may come in handy since you will be making curved cuts.

You could also use stencils.

Position the front of the jigsaw’s shoe at the starting point of the mark.

It is important to see that the blade is lined up with the marked line.

Then, turn on the saw and start cutting, moving slowly and gently.

Rotary Tool

A rotary tool fitted with a multi-purpose cutting blade is ideal to cut notches or when plunge cuts are needed.

Cutting Holes in MDF


Image source: Pexels

Drill

A drill which is either fitted with a regular bit, or a spade bit, can make holes of up to 1 ½ inches in diameter in MDF boards.

Should you need larger holes, or for holes that are not circular, you can drill the corners of the hole’s outline with a drill bit and then cut around with a jigsaw.

Rotary Tool

A rotary tool with a multi-purpose cutting blade can also be used to cut holes in MDF.

It is important that you guide the tool carefully around the outline and move slowly along.

Routing MDF


Image source: Pixabay

Basically any blade which can rout wood can also rout MDF.

However, it is important to use carbide-tipped blades so that they will not dull quickly.

While routing MDF, a lot of dust will be produced.

A handheld multipurpose tool with a routing accessory can produce less dust as it is smaller and easier to handle.

While routing, always move the tool against the direction of the blade rotation, as otherwise it might spin out of control.

You need to avoid this as it could easily ruin that particular edge.

Handheld Multipurpose Tool

A multipurpose tool can also be used.

Many opt for this option as it is a tool that is more affordable and suitable for various kinds of woodworking projects.

Such a tool will combine various individual functions within a single unit.

The most important thing is that you’re sure the handheld multipurpose tool you’ll be using is equipped with the right kind of blade for dense MDF boards.

Router

A router can also be used.

This power tool is characterised by a flat base, with a rotating blade extending past it.

The spindle can either be driven by an electric or a pneumatic motor.

The router is a portable tool and it can work well for MDF cutting, both for straight as well as curved cuts.

Sanding & Finishing


Image source: Pexels

It is important that once the cutting is done, the edges of the MDF are sanded down.

A 220-grit sandpaper is generally recommended for MDF.

Always wear a face mask to protect yourself from the fine dust particles that are produced.

After sanding, wipe off the MDF with a soft cloth, and look for any marks or scratches.

Should there be any, make sure to fill them with some drywall compound.

Conclusion

MDF is a versatile material which is considerably dense.

Therefore you need to be careful how you cut it to achieve flush edges.

By following the tips mentioned above with regards to tools, blades and methods, you should achieve better cutting results and a risk-free cutting experience.


What is Edge Banding?

Author Chigwell Building & Joinery

Date 12/01/2022

Each piece of furniture is made in a unique way.

Sometimes the small details are not noticed, as is often the case with edge banding.

Despite this, there is no denying that without edge banding the look of a particular furniture piece would not be as aesthetically pleasing or as neat.

Read on to find out more, or use a jump link below to skip to a desired chapter:


Table of Contents

  1. What is Edge Banding?
  2. Where is Edge Banding Used?
  3. Types of Edge Banding
  4. Tools Required
  5. Preparing the Surface
  6. Applying Edge Banding
  7. Finishing
  8. Conclusion

What is Edge Banding?


Edge banding is the decorative material that is used on the exposed edges of furniture in order to cover and seal the wood.

It is generally used on MDF, plywood and melamine coated particle board, whose edges look rather rough.

The process to apply edge banding is referred to by the same term.

Traditionally, the edge banding process used to be carried out with basic carpentry tools.

But over the years, the process has become more automated by means of hot-melt adhesives.

Where is Edge Banding Used?


Edge banding is mainly done to cover the sides and edges of furniture made from plywood and MDF.

These cheaper materials can be made to look just like real solid wood thanks to edge banding.

Besides improving their look, it also helps to increase the edges’ durability.

Edge banding is part of most furniture manufacturing companies’ production processes.

In such cases, it’s an automated procedure where hot-melt adhesive is used.

However a roll of edge banding can also be bought so anyone can apply it to plywood or MDF boards with some basic tools.

Edge banding is produced by some renowned manufacturers such as Rehau, Tece and Doellken.

These use a process called thermoplastic edge banding.

This is carried out by means of an extruder.

This is basically a machine that consists of a loading system for the various raw materials such as PVC, ABS, PMMA and colour pigments.

These get transported through a dye, which shapes the edge banding into the required size.

Following this, the edge banding gets printed and texturised to achieve the desired finish.

It is then sold in rolls.

Types of Edge Banding

Edge banding is available in different types of materials as well as varying thicknesses.

In the case of low-use areas, such as a home office, edge banding measuring 0.5mm is usually enough.

But in the case of higher-use areas such as kitchens, 1mm edge banding is more recommended as it’s more durable.

Thicker edge banding such as 3mm, is used for commercial jobs as in such cases longevity and durability are essential.

Apart from the various thicknesses, the two main types of edge banding are:

PVC Edge Banding


PVC edge banding is the most popular variety, especially when it comes to pressure laminated and melamine cabinets.

PVC edge banding is mainly made from thermoplastic resin.

This material is both durable as well as flexible.

To offer different varieties of edge banding, other materials as well as pigments are added to provide a broad range of colours, textures and woodgrains.

Veneer Edge Banding


This type of edge banding is made from real wood veneers.

These are pre-sanded and layered together.

Veneer edge banding can be found in finished and unfinished varieties.

This is due to the fact that the choice mainly depends on whether it will be applied to plywood that will be painted or stained, or otherwise.

Tools Required

You do not need any specialised carpentry tools to apply edge banding.

The most straightforward option is to apply it using an edge banding machine.

Such an automatic machine is used in commercial settings where lots of furniture pieces are being manufactured and finished.

In such cases, a precise application of edge banding is carried out easily and quickly.

However, if you’re a DIY enthusiast and need to apply some edge banding yourself, you do not need such a machine, or any specialised tools either.

In fact, all you really need is a clothes iron, an edge trimmer and glue.

You will also need a piece of sandpaper and a pair of scissors.

A chisel and mallet will also come in handy.

Preparing the Surface

The most important step is to prepare the surface area.

You need to make sure that the edge which will be covered with edge banding is as smooth and as flat as possible.

So you will need to get rid of any saw marks and rough bits by sanding it well.

Make sure that after sanding, you wipe off the dust and other residue from the surface well.

Next, cut a piece of edge banding which is around an inch longer than the length of the board’s edge to which you are going to fix it to.

To cut edge banding, you can use a pair of scissors or even simply fold it in two as it will snap easily.

Applying Edge Banding

Switch on your iron.

Ideally set it at a medium temperature, or a temperature that is suitable for cotton.

Start off at one side of the edge banding.

Press down with the iron and slowly move it along the length of the edge banding, until you eventually reach the other end.

Finishing

Once you are done there may be some ends of the edge banding overhanging.

To remove these, hold a chisel against the side edge and strike with a mallet to slice these parts off.

As soon as the adhesive has cooled and hardened, you can then trim the edges at the top and bottom so that the banding is completely flush.

A flush trimming tool is ideal for this task as you will just need to press it against the panel, slide it forward and cut.

Alternatively you can use a chisel.

Once the trimming is completed, sand the top and bottom faces lightly with a piece of sandpaper, so that any rough bits that may be present where the panels meet the edge banding are smoothened out.

Conclusion

Edge banding can practically make a board seem like a piece of solid wood, but it will actually be at a fraction of the price of the latter.

Edge banding comes in various types, colours and thicknesses, to suit varying needs and preferences.

It offers increased durability and a more aesthetically pleasing result, and so it’s widely used these days.


How to Design a Kitchen

Author Chigwell Building & Joinery

Date 08/12/2021

The kitchen is often regarded as the main focus of the home.

It is after all where the family spends a considerable amount of time in each others’ company for breakfast, lunch or dinner, or where you like to entertain guests.

Therefore it’s important to bear in mind some key factors when designing your kitchen, to ensure you make the best use of the space available.

You also want to make it as convenient and as aesthetically pleasing as possible.

Read on to find out more, or use a jump link below to skip to a desired chapter:


Table of Contents

  1. List Your Must Haves
  2. Consider the Best Layout for the Space
  3. Create a Floor & Wall Plan
  4. Consider an Island
  5. Places for Appliances
  6. Consider Storage Needs
  7. Get Inspiration
  8. Choose Your Materials
  9. Choose Your Colour Scheme
  10. Choose Your Worktops
  11. Choose Your Backsplash
  12. Choose Your Flooring
  13. Design a Lighting Scheme
  14. Electrical Outlets
  15. Window Dressing
  16. Shelving
  17. Conclusion

List Your Must Haves

Your first step should be to make a list of what you really want to have in your kitchen.

Note that as you prepare this list, you’ll become aware of certain things that you may want, and others which you simply must have no matter what.

So you should be able to distinguish between what you want and what you need.

In your existing kitchen you may wish to consider what is currently in place.

There may be aspects of the current kitchen that you really like and wish to keep.

But there could also be certain things about your existing kitchen that it currently lacks.

And this is key to designing and creating a better kitchen with improved form and function.

This process will help you decide what can be reused or recycled.

Consider the Best Layout for the Space


When planning a kitchen, one of the most important decisions will be the layout.

Some spaces are ideal for an L-shaped kitchen, whereas others are more suitable for a galley kitchen, or a U-shaped one.

The best layout should be selected to make the best use of the space available, whilst taking into account other factors, such as:

  • Will the layout selected suit our lifestyle?
  • Will there be a working triangle that is not too restrictive at either point?
  • Where will the kitchen table be placed?
  • What can work best with regards to the kitchen shape.

Create a Floor & Wall Plan


Once you have decided on the best layout, you can then move on to the floor plan.

It is important to draw out a detailed kitchen floor plan, and it’s best to make your drawings to scale.

Measure the floor area.

Then, start by marking the location of the doors and windows, as well as the location of the water pipes, and if required, the gas supply.

Then plot the kitchen cabinetry and the places where you will be installing the appliances.

A detailed floor plan will give you a good idea of the way to design your kitchen, and you will also be able to plan accordingly, thereby avoiding any mistakes or unnecessary extra costs.

A wall plan should also be prepared as you need to consider the type and number of cabinets that will be hung to the walls.

You need to be aware that kitchen walls are typically covered up in cabinets, and this might appear rather heavy.

Long blocks of cabinet doors look rather boring, so you may wish to consider some design ideas which will make them look more aesthetically pleasing.

This can include some glass doors, display shelves, and wine storage.

Consider an Island


An island can work very well for some kitchens, but it can be a huge mistake for others.

Hence you need to carefully evaluate whether a kitchen island will be suitable in your case or not.

Kitchen islands are great when it comes to offering more storage space, as well as additional surface space.

However the feasibility of an island will depend on your kitchen layout and space.

You will need to get the positioning and its size right.

For instance, you do not want the island to be neither too big nor too small.

This needs to be considered in relation to the floor space.

So you need to make sure that there is sufficient walkway in certain busier areas, such as where one needs to pass to reach the sink and the fridge.

Places for Appliances


You have compiled a list of appliances as well as any fixtures that you will be needing in your kitchen.

It is best to be rather specific as certain decisions may impact other considerations.

For instance, what oven size are you considering, and what size and configuration do you want for the sink.

Once you have decided on such factors you can then plan where you will be placing the appliances and any fixtures.

Draw them on the plan you prepared earlier.

Consider Storage Needs


One of the most important considerations for kitchens is the storage space.

There are so many things you will be storing in your kitchen, and chances are that you might be worrying if everything will fit in, especially in case your kitchen is rather small.

Try to plan a sufficient number of drawers, to prevent having too many drawers taking up the space where a cabinet could fit, as naturally the latter is better for storing bigger items.

You may wish to plan how you will be organising your food storage areas, to make sure that there is sufficient space and that everything will be within reach easily.

Get Inspiration


One of your main goals is to make sure that your kitchen is both convenient as well as aesthetically pleasing.

There are several different kitchen design ideas you could opt for, and it is a good idea to do some research and get inspiration by looking up photos of different kitchens.

You might love rustic or country kitchens, or more contemporary and modern ones.

The sky’s the limit when it comes to picking your favourite kitchen design.

While this may depend mainly on your preferred style and your home’s features, you may wish to get creative too.

Planning a kitchen can be a fun experience, and it will be great to look up other people’s kitchens to get inspiration and some ideas.

Choose Your Materials


It is very important to choose the best materials for your kitchen.

At this point you will probably have a good idea of what you want, both with regards to the style and the preferred materials and finishes.

While the choice of materials may depend on your budget, it’s recommended that you consider the durability and the quality of the materials carefully.

You want to make sure that the kitchen will last and that it will retain its good looks for years to come.

In the case of a traditional kitchen, most people opt for hardwood or plywood.

The latter is less costly and it makes for a good choice in case you are on a tight budget.

Hardwood is more hard wearing and robust, and it is often the most popular choice for kitchens that are designed with a traditional style.

On the other hand, if your kitchen is rather contemporary or modern you will want a sleeker look.

Fibreboard is the material which is generally used for such styles, as it has a smooth surface but looks chic and elegant despite being a minimalist style.

A word of caution - when it comes to kitchens you should stay away from wood veneer and particleboard.

These are affordable but not ideal for kitchens as they can easily peel and chip.

Choose Your Colour Scheme


The colour you choose for your kitchen cabinets is of utmost importance too.

White remains a popular choice for many, and there are other alternatives to it, such as off-white and cream, as well as pale grey which are also very popular.

The main reason is that the more pale coloured a kitchen is the more options you will have when it comes to choosing the decor, such as the tiles, as you will be able to go bolder.

Moreover, if your kitchen is small it is important that you stick to a light palette or soft shades to visually make the room look bigger.

Darker tones are also popular, especially in cases when there is plenty of light in the room and so you can afford to go darker.

Dark kitchens are also preferred by those who opt for a modern or contemporary style.

Choose Your Worktops


Kitchen worktops are another key consideration.

You will need to work with your budget, while also taking into account your particular preferences both in terms of materials as well as colours.

It is important to keep an eye on quality as kitchen worktops will naturally be exposed to considerable wear and tear, spills and possibly, stains.

You also need to take into account the cleaning and maintenance factors.

There are several options to choose from nowadays.

Make sure to consider the various pros and cons of different worktop materials to choose the best one for your kitchen.

Let us check out different options in some more detail.

Granite

Granite remains a very popular option as it looks so beautiful, but it is important that it is sealed and well cared for.

It is also a bit expensive too, so in case your kitchen is rather large you may end up paying a considerable amount on granite worktops.

Having said that, granite is ideal if you want something that looks natural and that has a unique tone and pattern.

Quartz

Quartz is another good option and it has increased in popularity recently as it is heat resistant and relatively affordable.

There are also several colours to choose from, and it can look nice both with traditional as well as modern kitchens.

Marble

Marble countertops look beautiful and if well maintained, they will increase your kitchen’s value.

However, they are expensive and heavy.

Another disadvantage of marble is that it is porous and so it can stain easily, and is not so resistant to scratches and chips.

This makes it rather problematic for kitchen countertops.

Corian

Corian comes in various colours and patterns and so it can complement most kitchen styles nicely.

Corian is a strong material and so you will not have to worry about scratches and stains.

It is quite heat resistant too.

Since it is solid, it is a durable material, making it a very popular option for kitchen worktops.

However, it is rather expensive.

Butcher's Block

Wood may look nice and warm, but it requires plenty of care on a regular basis to keep in good condition.

Butcher’s block and wood certainly look beautiful and complement rustic and traditional kitchens nicely.

And besides, it is not that expensive either, especially when compared to granite for instance.

Laminate

Laminate is an affordable option.

Many opt for it if they are on a tight budget, but looking for something practical and relatively long lasting.

In fact, laminate is very easy to look after.

Stainless Steel

Stainless steel may not be a popular option for all worktops.

However it is resistant and looks sleek and professional.

Some may consider it as being too silvery and cold looking and in case of a traditional or rustic kitchen it would not complement it well.

Copper

Copper is a good option for kitchen countertops.

It is relatively long lasting and resistant.

It is a sustainable material and completely recyclable.

Moreover it is naturally antimicrobial and easy to clean too.

However, since it is relatively soft it could dent easily and it is susceptible to scratches.

Choose Your Backsplash


The backsplash may seem like a minor detail but it is actually quite important.

It can serve as a unifier between the cabinetry and at the same time protect your walls.

There are various materials you can choose from, including:

Ceramic Tiles

Ceramic tiles remain a popular option as they are affordable and resistant.

They are also very easy to clean.

Glass Tiles

Glass tiles may be beautiful but they are not so practical.

Besides, they can be quite expensive too.

Granite

Looks beautiful but apart from being costly, it is important to ensure a regular sealing from time to time.

Quartz

A Quartz backsplash will complement any kitchen style and its seamless finish is an undeniable advantage.

It is also easy to clean.

However it can be rather expensive and is not very heat resistant.

Marble

Marble is an expensive option and it can stain easily due to its porous nature.

It will also require regular sealing.

However, it certainly looks aesthetically pleasing and it is durable.

Choose Your Flooring


Kitchen flooring needs to be hard wearing as it has to deal with splashes, stains and high levels of condensation.

Hence it is important to keep these factors in mind when choosing your kitchen flooring.

Here are some options and their respective pros and cons.

Tiles

Tiles remain the foremost preference for many households.

There are countless types and colours to choose from.

Ceramic and porcelain tiles are very popular, and real stone is quite popular too.

Tiles are durable and resistant, but they can be relatively expensive.

However they are easy to clean and maintain.

Hardwood

Hardwood is not recommended for a kitchen since the high moisture levels in the room are not that great.

However you may wish to opt for engineered wood, which looks just like real wood but is more suitable for a kitchen’s temperature and moisture levels.

Laminate

Another relatively popular option is laminate flooring.

It is an affordable material and it is great since it looks like wood, or tiles, and in most cases it has a very realistic appearance.

Do make sure to check different types of laminate though to opt for the best quality, as some may not be of a high grade, and are thus not recommended especially for a kitchen.

Vinyl

Vinyl is another budget friendly flooring option.

You can find several designs and colours that mimic natural materials.

Vinyl is recommended as it is quite durable and very easy to clean.

Concrete

Concrete flooring is becoming increasingly popular for kitchens.

It is durable and highly resistant to spills and stains.

It is also quite affordable.

Design a Lighting Scheme


Lighting considerations are of utmost importance when designing a kitchen.

You will need to carefully consider the task lighting, as well as ambient and accent lighting.

There are different lighting options to choose from and so you will need to choose carefully.

From LED lights underneath units and lighting cabinet lights, to pendant lights over islands and spotlights, the sky’s the limit when shopping for kitchen lights!

Here are some tips in this regard.

Electrical Outlets


Consider the number of electrical outlets needed, as well as their locations.

You should bear in mind smaller kitchen appliances too, such as toaster, electric kettle, coffee maker, blender etc.

It is a good idea to install multiple outlets and this can be done along the backsplash, as well as on the island, if you will have one.

You may also wish to consider outfitting a drawer with outlets as in this way they will be discreetly hidden away.

Window Dressing


All window treatments in a kitchen should be as easy to clean as possible.

They should be unaffected by any possible splashes, especially if they are close to the sink.

Shutters work well, and you can also opt for kitchen blinds as they are practical and made from ideal materials.

Shelving


Consider any shelving in the kitchen.

Shelving can come in different styles and sizes.

It can be indispensable to store certain items as well as for organising.

Moreover shelving works very well to spruce up the wall bit rather than seeing only cabinets.

Conclusion

Through this overview of various kitchen design tips and guidelines, you should have a better idea how to go about this process.

We hope that we offered you a good helping hand so that you will be able to design the kitchen of your dreams!