Get Splint Free Results with Our Plywood Cutting Guide
Plywood is a very popular material that is commonly used on a number of DIY and construction projects due to its low cost, versatility and reliability.
This factory produced timber product does not warp, shrink or crack with changes in atmospheric temperatures or moisture, making it ideal for many application.
It’s not uncommon to find plywood being used in products such as furniture, cabinets and tables as well ad used in common construction processes including flooring substrates and materials, formwork for concrete, partitioning and external walls.
It’s even found in packaging such as shipping crates and boxes that require strength and durability.
However, if you intend to use plywood where it will be visible, getting clean cuts is vital to ensure you get a splint free finish and no rough edges.
Here’s how to achieve clean cuts using plywood.
Accurate Measuring
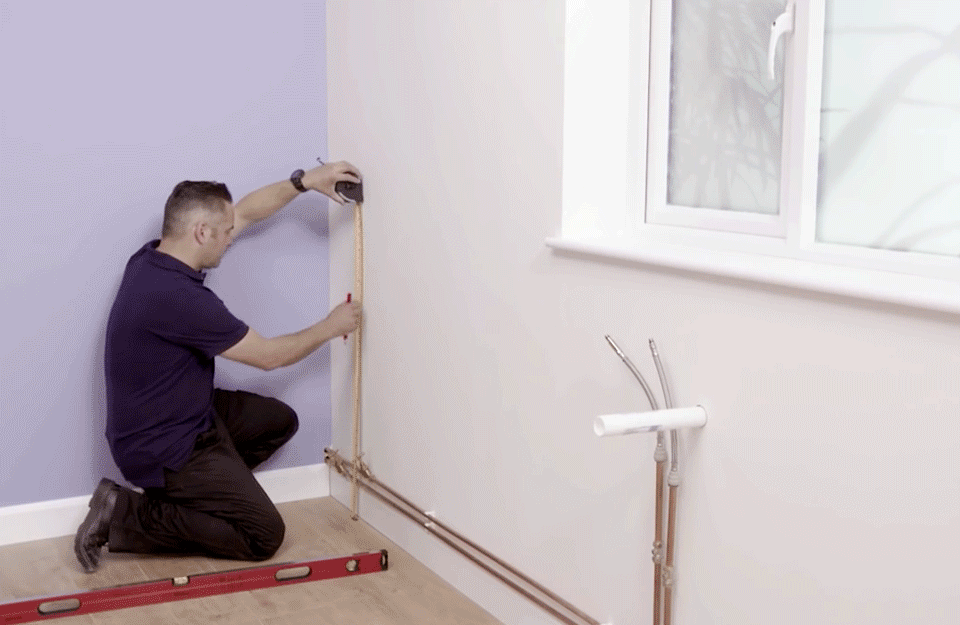
Firstly, it’s important to ensure you have accurate measurements marked out on to the plywood to get clean joints and precise edges.
When measuring, lay the plywood sheets on a level flat surface such as a floor or cutting table that will ensure the ply stays flat and does not bend.
Depending on the tools you intend to cut with will determine which side of the plywood to mark.
For example, if using a table saw you should mark the unfinished side.
Whilst if using a circular saw, jigsaw or handsaw, you should mark the finished side.
Now mark your measurements on the long edge of the ply using a pencil.
Then mark the same measurement on the other side of the ply.
Using a metal square to ensure an accurate 90º angle, draw a line joining the two marks you previously made using a ruler or straight edge as a guide.
Repeat this process if you need to make other cuts.
Using a Table Saw
If you’re fortunate enough to own a table saw, cutting plywood is a breeze.
Firstly, set the blade to be about 12-13mm higher than the thickness of the plywood sheets you want to cut.
Now before you start, make sure the surface of the table saw is completely clean of debris as this may cause bad cuts if the board moves or is misaligned during cutting.
As you cut the plywood, you will produce a lot of sawdust.
Although relatively harmless, always wear a suitable mask over your mouth and eyes to protect you from breathing in fine sawdust particles or getting them into your eyes.
When you’re ready to cut, switch on your table saw and feed the plywood gradually towards the blade in one smooth motion and continue until the entire board has been cut.
If the sheet is large, have someone help take the other end to ensure the ply moves smoothly and does not bend.
This should give you nice clean edges and little to no splintering.
Using a Jigsaw or Circular Saw
Before cutting the plywood, you’ll need to place it onto a suitable sawhorse or surface that will ensure the plywood stays flat, does not move and allows the blade to pass unobstructed from one edge to the other.
You will also benefit from either clamping the sheet into place to prevent movement or having an extra pair of hands if the plywood sheet is large, as bending and distorting will cause splinters and inaccurate cuts.
When you’re ready to cut, line up the edge of the saw blade against the marking on the plywood and switch on the tool.
If possible, start cutting alone the pencil marking and continue in one fluid motion until the entire sheet is cut with an assistant holding the ply to ensure it stays flat and does not move.
If the sheet is too big to cut in one go, switch off the jigsaw or circular saw only when you have come to a complete stop and wait for the blade to stop oscillating or spinning completely before removing.
Now take the saw to the opposite end of the mark, begin cutting and continue until you reach the previous cut to finish cutting the whole sheet.
It is important at this stage that help is at hand to hold the sheets and prevent them from dropping or falling once you have two cut pieces.
Any movement will splinter wood and ruin the finish.
Using a Handsaw
If you do not have any electric tools, you can use a handsaw to cut plywood although it requires skill and strength.
The best finishes are always achieved if the cuts is completed in one motion.
Although this requires a lot of energy and effort, this will achieve a better finish and less splintering. Only stop is you really have to.
Just like using a jigsaw or circular saw, you will need assistance to ensure the plywood is held firmly and does not move during cutting.